Notes on Five Times Report
WARNING AND
DISCLAIMER: If you are underage, then
consult with your parents or guardians before attempting any of this.
You are on your own - I'm not responsible for your actions or harm you may
bring to others because of your actions. Making the items described
below can result in injury or death to you or people in your vicinity.
Some things mentioned here may be illegal to make in your city, county, state,
or country so check the laws that apply to you before you attempt anything
described here. These notes are
not complete on purpose. If you are reading them and new to pyrotechnics, then
you are making a mistake. Stop now - this page is not for you. Get a beginning
book on fireworks (see Skylighter or American Fireworks News (very quick
shipping) for a start) and read up. You can't make any of this work
without more information so read up or join a club or ask someone to
help you.
This is a living document - changes are being made often.
This is a note on a Five Times Report shell meant to
fly on a one pound motor. This is NOT my design but was given me by a master
pyro who wishes to remain anonymous. I have found that I cannot exactly
duplicate his version. This is my way of skinning the cat.
This shell consists of four reports in 5/8-3/4 tubes about 2
to 2.5 inches long. On top of the four reports is the fifth report or bottom
shot.
The shell is very light - dispersal of the reports is minimal. A 1
gram flash shot is used to burst the shell - I augmented my version by
filling the voids with BP.
I have also used photo-flash inserts for four of the
'reports'. This causes four timed flashes with little noise and then the
bottom shot (noise!). The photo-flash inserts are made from 1/2 BP and
1/2 fine magnesium using the same tubes and timing used for the reports. The
end plugs are tight fitting felt - not glued.
Above is what the master pyro's version looks like - mine
won't look like this. ;-} I was able to make a
shell that roughly looked like this but I couldn't get it to work the way I
wanted. My version is slightly smaller
and it uses different wrapping techniques to get the break right.
Verson Three Pictures
(yes, there were versions one and two)
The V3 motor did not change from the version two motor. It
is a 3/4" BP motor that uses 116 fuse powder. The spindle is an LWS spindle.
The delay is Win39 (3/4"). There is a clay bulkhead with a 1/4" passfire.
The motor, thankfully, has been very reliable and it will kick this payload
to 1000 feet plus. The delay is meant to get the shell to break at
about 750 feet. The upward momentum aids in the dispersal of the inserts. A
nice alternative configuration for the motor is to use 116 powder (or
equivalent) as the core and then add 20% 10-30 mesh Ti and 116 for the
delay. 1" delay is adequate. You must use a clay bulkhead.
See the motor description in the Cap Plug Shell
page for more information.
Make up tubes, fusing and shots ahead of time. Read
through this to see what they look like.
V3 paper wrap - no glue touching the inner reports
Start with 2" x 5/8" tube and add 1/2" extension with 60
degree opening cut in it.
Tube should be loaded with 8 grams of 7/3/1 flash, the ends sealed
with
epoxy and fused/cross matched before extension attached.
Alternatively, cut the opening in an empty tube and then add the fuse.
Use lots of epoxy on the fuse holder to prevent blow-through. If making an
'add on' extension, there will probably be some glue on the edge of the
tube.
Trim it off before before adding extension. A knife will work. A lathe
will work.
Super glue seems to work best for adding on the extension
without making a
big mess.
Each tube has
8 grams of 7/3/1 flash +20% Ti.
Fuse timing is 1/4" starting at 3/4". Bottom shot fuse is
2" long. (add picture)
Cutting extensions on lathe - extensions can be also be
done with hacksaw or even knife
If you don't cut the end piece into the tube itself
but add it onto the completed
salute - I find it easiest to clamp the end piece on with a small wood clamp
and then
super glue it.

Rolling first loaded tube with 50lb outer wrap. 3.5" strip
at front is
to secure the paper to the first tube so wrap can be tight. Total paper
length is 14.5" with 5/8" tubes. Width is 3.5" - which
overlaps the tubes by
1/2" on each side. Paper will wrap around
package twice.
Wrapped tubes painted with NC. BP is poured over the wet
NC
and the NC is allowed to dry. The excess BP is then poured off. The
prime
is mostly added to the walls of the tubes and not the fuses themselves.
Chipboard bulkhead on top of package. Do not
fasten to inserts
Overlapping paper is glued to chipboard only.
Insert bottom shot fuse inside the opening and glue it in
- hot glue seems to work best.
Cross match should extend down into the device - touching the shot area (add
bottom shot fuse picture)
Fill bottom of shell with hot BP and leave depression in
center for shot. You
can see the cross match from the bottom shot peeking through in the center.
BP should be packed in fairly tightly so the package has good rigidity.
1 gram shot for bottom of
shell. Made with 3/8" former. 1" gummed
tape used for
case. One wrap only. Modified flash used.
Shots are sealed with NC. Middle shot
was left unsealed to show crimp.
3 KClO4
3 KNO3
3 809 Al (I used 10890)
1.5 BaNO3
1.5 Antimony Sulfide
1.5 Sulfur
+20 Ti
Add shot and crimp over cover and glue. Paper is single
chipboard.
Hole is 3/16". Shot is sealed on back of chipboard with NC.
Looks like this. Weight for this version is 98 grams.
Click on the above image
to see the header in action - in this case it is the exact one in the
picture
Click on the above image and see the Photo Flash version
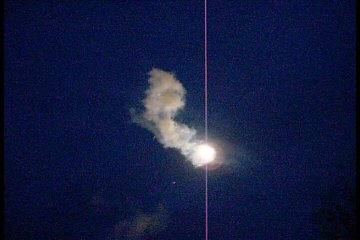
Testing these on the ground is fun. Here is
how I do it
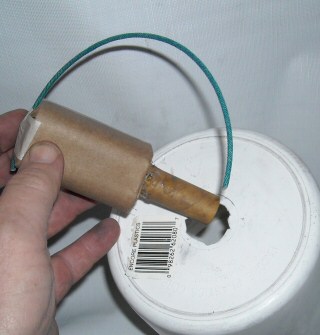
Put a long fuse on the header and stick it in the back of
a disposable bucket or pail.
Click on the above image to see the ground test. The timing between
the third and fourth
report was an experiment.